From Drilling to Distribution: Understanding the Full Water System for Wholesalers & New Technicians
Written by Morgan Christian on
Whether you're a wholesaler, a new technician, or someone supporting contractors in the field, knowing the full lifecycle of a water system — from drilling through distribution — is essential. TheWater Systems Handbook (Book I–IV) outlines the full construction of a sanitary, high-performing well system, while theMerrill Catalog provides the specific components used at each stage.
This guide gives your team a clear, technical, manufacturer-approved overview of how a water system works and where each Merrill component fits in.
1. Stage One: Drilling & Well Construction
Where groundwater access begins.
The Water Systems Handbook explains that proper well construction includes:
Drilling to an aquifer appropriate for long-term adequate yield
Setting casing to isolate the well from contaminated shallow layers
Sealing the annular space with grout to prevent surface water infiltration (Book I, Well Construction)
A sanitary well requires:
✔ Casing termination above ground
The Handbook requires wells to be completedabove finished grade to avoid contamination from surface water.
✔ A sanitary well cap or well seal
A critical protection to prevent insects, debris, and vermin infiltration.
✔ A proper vent
Vents must be screened to allow pressure equalization while keeping out contaminants.
Merrill components used at this stage (Catalog pp. 80-85):
All provide casing-size charts and specifications. Merrill2026
Sanitary well caps and seals help protect the well opening from insects, debris, and surface contamination.
2. Stage Two: Submersible Pump Installation
How water is lifted from the aquifer.
According to the Handbook, submersible pumps are installed deep in the well and connected by drop pipe, wire, and a discharge assembly (Book II, Pump Installation). Water Systems Handbook 13th Edition
While Merrill is known primarily for external well system components, many of its parts (e.g., NL fittings, valves, adapters) integrate into indoor systems depending on the application.
7. Understanding the System as a Whole (Why This Matters for Wholesalers & New Techs)
The Water Systems Handbook stresses that every well is acomplete sanitary system, not a collection of random parts.
A wholesaler or technician who understands the entire path:
aquifer → pump → pitless → pressure tank → distribution → hydrant
can:
Recommend the right components
Reduce contractor callbacks
Help diagnose system failures
Increase system longevity
Ensure sanitary compliance
Improve customer trust
And because Merrill covers nearly every stage with certified components, technicians can build acompatible, long-lasting reputation using one supplier.
8. Where Merrill Components Fit in the Full System (Catalog-Verified)
System Stage
Merrill Component
Catalog Pages
Wellhead
Well caps, seals, vents
80–85
Submersible pump
Check valves
151–163
Frost protection
Pitless units, adapters
42–79
Yard distribution
Frost-proof hydrants
8–41
Above-ground and below-ground plumbing
Fittings, valves, accessories
See index
All page references are directly verifiable in the 2026 Catalog. You can click Here: Merrill2026
Final Takeaway
Wholesalers and new technicians don’t just sell components — they support an entiresanitary water system.
When you understand:
How wells are drilled
How pumps are installed
How pitless units protect sanitation
How pressure tanks assist flow
How hydrants deliver water
How fittings ensure system integrity
…you become a trusted partner to contractors, drillers, and homeowners.
And with Merrill’s catalog covering nearly every stage from drilling to distribution, your team can confidently recommend reliable, certified, American-engineered components backed by 77 years of industry experience.
Whether you're a wholesaler, a new technician, or someone supporting contractors in the field, knowing the full lifecycle of a water system — from drilling through distribution — is essential. The Water Systems Handbook (Book I–IV) outlines the full construction of a sanitary, high-performing well system, while the Merrill Catalog provides the specific components used at each stage.
This guide gives your team a clear, technical, manufacturer-approved overview of how a water system works and where each Merrill component fits in.
1. Stage One: Drilling & Well Construction
Where groundwater access begins.
The Water Systems Handbook explains that proper well construction includes:
Drilling to an aquifer appropriate for long-term adequate yield
Setting casing to isolate the well from contaminated shallow layers
Sealing the annular space with grout to prevent surface water infiltration(Book I, Well Construction)
A sanitary well requires:
✔ Casing termination above ground
The Handbook requires wells to be completed above finished grade to avoid contamination from surface water.
✔ A sanitary well cap or well seal
A critical protection to prevent insects, debris, and vermin infiltration.
✔ A proper vent
Vents must be screened to allow pressure equalization while keeping out contaminants.
Merrill components used at this stage (Catalog pp. 80-85):
Well caps
Sanitary caps
Well seals
All provide casing-size charts and specifications.Merrill2026
Your browser does not support the video tag.
Sanitary well caps and seals help protect the well opening from insects, debris, and surface contamination.
2. Stage Two: Submersible Pump Installation
How water is lifted from the aquifer.
According to the Handbook, submersible pumps are installed deep in the well and connected by drop pipe, wire, and a discharge assembly (Book II, Pump Installation).Water Systems Handbook 13th Edition
Key system components:
✔ Drop pipe
Transmits water from the pump to the surface.
✔ Pump cable & splice kit
Provides power while maintaining waterproof electrical connection.
✔ Safety rope
Provides extra safety if pipe fails and supports pump weight during lowering and servicing.
✔ Check valves
Prevent backflow, pressure loss, and water hammer. The Handbook and Merrill catalog align on the need for multiple check valves in deep wells.
Merrill components (Catalog pp. 151–163):
Several material options available in check valves
No-lead check valves
Variable Flow Check Valve
Stainless steel options and specialty valves
Check valves and pump accessories help protect the submersible pump system and keep water moving in the right direction.
3. Stage Three: Pitless Discharge & Sanitary Sealing
The transition between underground and the pressure system.
The Water Systems Handbook defines pitless units and adapters as components that:
Provide a watertight, frost-proof connection
Prevent contaminants from entering near-surface openings
Allow full service of submersible equipment without or limited excavation(Book IV: Components)
Merrill Pitless Units (Catalog pp. 42-79):
Factory pressure-tested
ASSE/PAS-certified watertight design
Positive mechanical seal with stainless adjusting nut
Stainless steel on all parts touching water
Full diameter access inside well
These ensure long-term sanitary integrity and easy well maintenance.
SPP Pitless Units help create a watertight, frost-proof connection between the well and the underground discharge line.
4. Stage Four: Distribution to the Pressure System
Where water leaves the well and enters the home or facility.
This stage includes:
✔ Pressure tank
Maintains constant water pressure and reduces pump cycling.(Book VIII, Pressure Tanks – Handbook)
✔ Pressure switch
Controls pump on/off operation based on waterline pressure.
✔ Relief valve
Protects the system from dangerous overpressure.
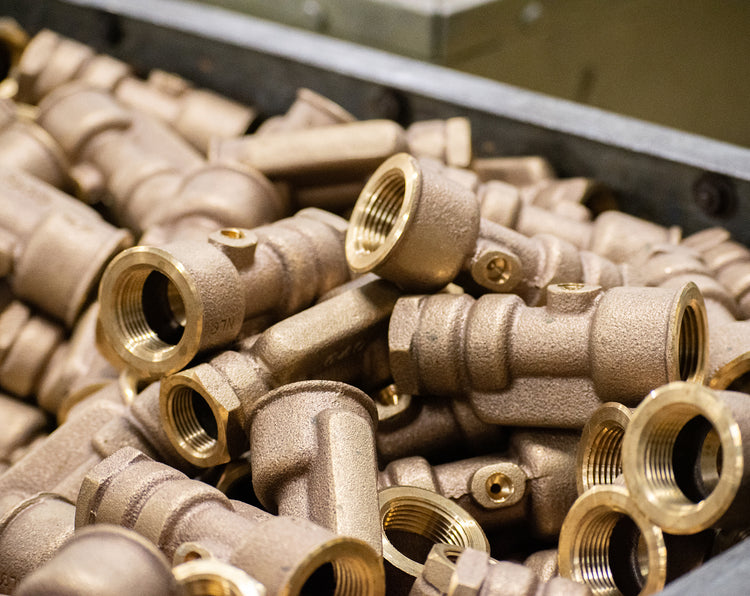
✔ Tank tees & fittings
Connects tank, switch, gauge, drain valve, and relief valve.
Merrill manufactures essential fittings that appear throughout this part of the system.
Your browser does not support the video tag.
Heavy-duty pressure switch features help control pump operation based on system pressure.
5. Stage Five: Yard Hydrants & Outside Water Distribution
How water is delivered outdoors.
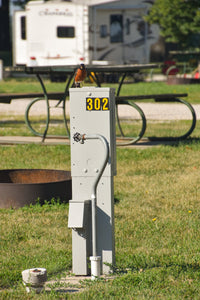
The Water Systems Handbook describes hydrants as surface-accessible delivery points requiring frost protection and proper drainage.
Merrill hydrants — AnyFlow, Hide-Drant, C-1000, M-2000, R-6000, E-5000, and several more — use a drain-back design where:
The valve body is buried below frost line,
Water drains into the ground or a clean gravel bed after shutoff.
Correct installation prevents freeze failures, back-siphonage, and contamination risks.
AnyFlow hydrants use a drain-back design to help protect water access from freezing after shutoff.
6. Stage Six: Inside Distribution & Final Use
How water moves inside the building.
Components include:
Shutoff valves
Manifold fittings
Well faucets
Hose bibbs
Indoor water distribution fittings
While Merrill is known primarily for external well system components, many of its parts (e.g., NL fittings, valves, adapters) integrate into indoor systems depending on the application.
7. Understanding the System as a Whole (Why This Matters for Wholesalers & New Techs)
The Water Systems Handbook stresses that every well is a complete sanitary system, not a collection of random parts.
A wholesaler or technician who understands the entire path:
aquifer → pump → pitless → pressure tank → distribution → hydrant
can:
Recommend the right components
Reduce contractor callbacks
Help diagnose system failures
Increase system longevity
Ensure sanitary compliance
Improve customer trust
And because Merrill covers nearly every stage with certified components, technicians can build a compatible, long-lasting reputation using one supplier.
8. Where Merrill Components Fit in the Full System (Catalog-Verified)
System Stage
Merrill Component
Catalog Pages
Wellhead
Well caps, seals, vents
80–85
Submersible pump
Check valves
151–163
Frost protection
Pitless units, adapters
42–79
Yard distribution
Frost-proof hydrants
8–41
Above-ground and below-ground plumbing
Fittings, valves, accessories
See index
All page references are directly verifiable in the 2026 Catalog. You can click Here: Merrill2026
Final Takeaway
Wholesalers and new technicians don’t just sell components — they support an entire sanitary water system.
When you understand:
How wells are drilled
How pumps are installed
How pitless units protect sanitation
How pressure tanks assist flow
How hydrants deliver water
How fittings ensure system integrity
…you become a trusted partner to contractors, drillers, and homeowners.
And with Merrill’s catalog covering nearly every stage from drilling to distribution, your team can confidently recommend reliable, certified, American-engineered components backed by 77 years of industry experience.
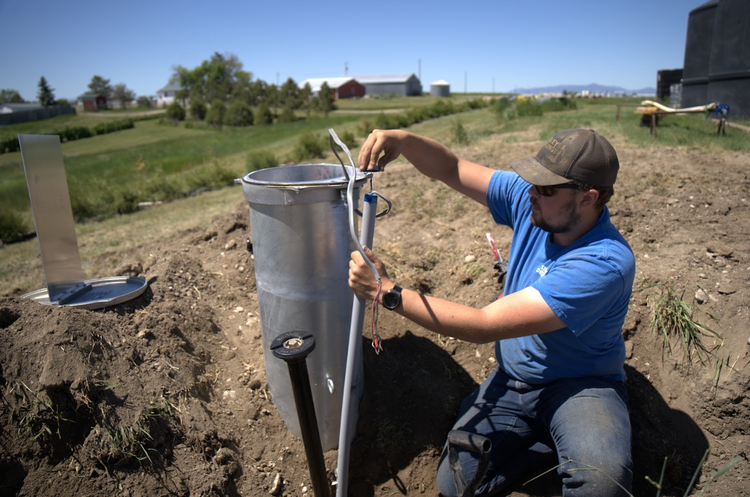
A pitless unit isn’t just another component in a pumping system — it’s the foundation of a sanitary, frost-proof, serviceable well installation. And when it’s installed correctly, it protects groundwater, avoids contamination pathways, prevents freeze damage, and ensures the system can be serviced without excavation.
This guide breaks down what pitless units do, why installation technique matters, and how Merrill Manufacturing’s certified designs support long-term system performance.
1. What a Pitless Unit Actually Does (and Why It Exists)
According to the Water Systems Handbook, pitless equipment:
Provides sanitary connections and prevents contaminants from entering near-surface or surface openings into the well or water supply.
Allows the well casing to terminate above ground, with a permanently buried discharge connection below frost line.
Protects water from temperature extremes and provides convenient access to system components without excavation.
In short:Pitless units exist so wells remain sanitary, frost-proof, and maintainable — without pits, pump houses, contamination risks, or extra on site work to service a well.
Below cross section of water well system- 1. Pitless Unit
2. Pitless Adapter vs. Pitless Unit — What’s the Difference?
Pitless Adapters
Below-ground devices that connect through the casing below frost line. They are inserted through a cut hole and include inner/outer components that seal together.
Pitless Units
A full factory-assembled system installed on top of the casing. The installer cuts the casing to the required bury depth, removes internal parts, mounts the unit, and lowers the components into position. These units come pressure-tested from the factory and are designed to be fully watertight when installed correctly.
Quick Summary
Feature
Pitless Adapter
Pitless Unit
Install method
Cut-in through casing wall
Installed on top of casing
Access
Partial
Full-diameter access to well
Sanitary sealing
Good
Best (certified watertight)
Factory testing
Not possible- on site intall
100% pressure tested (Merrill)
Best use
Lower-cost jobs
Long-term reliability, deep wells, system longevity
3. Why Proper Pitless Installation Is Critical
A. Sanitary Protection
A pitless unit is a key of a sanitary well construction method. It stops contaminated surface or near-surface water from entering the well.
A poor pitless installation = a direct pathway for contamination.
B. Freeze Protection
The discharge connection must be below the frost line. Pitless units with pressure tested discharge allow the well to be completed above grade while still keeping the buried plumbing protected from freezing temperatures.
If the bury depth is wrong — frost damage is highly likely.
C. Pressure Integrity
Handbook guidelines describe pressure integrity as essential for maintaining sanitation in pitless systems, especially in submersible pump installations.
If seals, gaskets, or O-rings are not properly engaged → the system can leak and compromise sanitary protection.
D. Serviceability Over the Well’s Lifetime
Pitless construction allows the drop pipe and pumping equipment to be removed from above ground for service.
Incorrect installation can prevent disengagement, requiring excavation — or risking dropping equipment down the well.
4. Merrill’s Pitless Units: What the Catalog Confirms
From the Merrill Manufacturing catalog:
Certified Watertight under ASSE 1093, PAS-97 and state well codes.
100% pressure-tested at factory to ensure proper sealing to discharge.
Positive mechanical seal using stainless steel adjusting nut — easy to operate and rust-free.
Full diameter access with no obstructions for service work.
Large spud gasket / thick O-ring seal ensures a watertight seal inside casing and around discharge.
Heavy-duty support plate holds more weight and reduces risk of losing equipment down the well.
5. Essential Steps for Installing a Pitless Unit Correctly
(Aligned with Water Systems Handbook installation guidance)
1. Determine correct casing diameter and bury depth
Installer must specify these before installation begins.
2. Cut casing at proper depth
Casing is cut off at bury depth — critical for frost-line placement.
3. Mount the pitless unit to casing
By threading, welding, or compression gasketing depending on contractor preference.
4. Connect discharge
Discharge piping attaches before inserting internal components.
5. Engage seal inside the well
Internal components are lowered and locked into sealing position.Merrill’s adjusting nut then ensures a positive mechanical seal.
6. Confirm watertight integrity
Merrill already pressure-tests units at the factory, but installers should ensure:
O-rings are clean and properly seated
Spud gasket is correctly aligned for those models
No distortion of well casing
Proper torque on fasteners
6. When Installers Get It Wrong — Common Failure Points
Based strictly on the failure modes implied in your sources:
Insufficient seal engagement → loss of pressure, sanitation risk.
Improper casing cut height → freeze problems.
Misalignment of spud gasket → leaks and corrosion issues.
Using wrong type of coupling → poor casing connection and compromised watertight seal.
A properly installed pitless unit removes these risks and ensures decades of reliability.
7. Why Drillers & Installers Prefer Merrill Pitless Units
You can confidently state this using catalog facts:
They are certified to current ASSE and PAS standards for sanitation and watertight performance.
They provide full access for pump service without obstruction. Unit seal ports not damaged when service the well.
They include heavy-duty components such as stronger support bars and stainless steel fittings.
They undergo 100% factory pressure testing, something not guaranteed with many other brands.
Final Takeaway
A pitless unit is the best longterm and easiest to intall.
Units installed correctly — following the requirements laid out in the Water Systems Handbook and paired with Merrill’s certified, pressure-tested designs — you get:
Superior sanitation
Reliable freeze protection
Long-term system pressure integrity
Full-service accessibility - safe from damage during service work.
Decades of trouble-free operation
A water system rarely fails all at once. It usually shows symptoms — pressure fluctuations, air in lines, freeze problems, inconsistent flow, or unexpected cycling. The Water Systems Handbook (13th Edition) emphasizes diagnosing failures by checking each component in the hydraulic chain:
The outlet device (hydrant)
The pressure switch or motor control
The back flow components (check valves)
The wellhead sealing (well caps, vents, gaskets)(Book I & II – System Troubleshooting & Construction Principles)
This guide helps wholesalers and technicians recognize where failures originate and which Merrill components address them.
1. Diagnosing Hydrant Problems - Yard Hydrants Collection
Hydrants are one of the most visible failure points because they’re the customer-facing part of the system. But hydrant issues are often symptoms, not the root cause.
Common Symptoms (Handbook Principles)
Riser freezing
Incomplete drain-back
Hard operation / stuck handle
Weak or inconsistent flow
Water leaking from weep hole or surface
Likely Causes
These issues typically relate to:
Not adequate drainage or no gravel or clay soil
Drain port obstruction or debris in drain from inside valve body
Packing guard handle rod valve body has debris washed into it. or lever bolt thick lever is overly right
Debris in waterline or inlet to valve body, or could be hydrant is connected to well prior to tank and pressure switch.
Worn internal parts (plunger, packing replaced around handle rod )
How Merrill Hydrants Address Failures - Yard Hydrants Collection
Premium Hydrants (ANY FLOW®, C-1000, R-6000) use robust valve mechanisms that maintain alignment and provide smoother operation — reducing sticking and incomplete closure. Much longer operation life many on-off cycles each day.
Economy Hydrants (M-2000, E-5000, B-7000) provide reliable drain-back when installed correctly, preventing freeze failures. Longer operation life than low cost import hydrants and made in Iowa.
Specialty Hydrants (HIDE-DRANT, Y1, Y2, ANY TEMP) solve sanitary no drain back, public-use, or heated always on operation problems where standard hydrants cannot fully answer the application.
Key takeaway:If a hydrant freezes or drains poorly, the cause is usually installation or environment, not the hydrant itself. Merrill hydrant sleeve can fix most of the problems, and answer to cast hydrant in concrete.
2. Diagnosing Check Valve Problems - Check Valves Collection
The Handbook is clear: even minor check valve issues can destabilize the entire system.(Book II – Pumping Systems & Check Valve Behavior)
Common Field Symptoms
Pump short-cycling
Pressure dropping when no water is used
Noisy “chatter” in piping
Water hammer on shutoff
Likely Causes
Worn or debris-damaged poppet sealls
Too few check valves
Corrosion or scale buildup
How Merrill Check Valves Solve These Issues - Check Valves Collection
(Catalog pp. 151–162)
Merrill NL / Standard Check Valves → Ensure proper sealing to prevent backflow and cycling.
Stainless Steel Valves → Greatly reduce internal corrosion that along with no-spin poppet design leads to valve sticking, and no-spin poppet.
Variable Flow Check Valve (VFC) → Allows installers to greatly reduce pressure loss maintain consistent pressure. water hammer and chatter.
Key takeaway:Most pressure problems trace back to one thing: the need for well screens or more check valves are needed.
3. Diagnosing Pitless Unit Problems- Pitless Units Collection
The Water Systems Handbook emphasizes the role of pitless units in maintaining sanitary seals, stable pressure, and freeze protection.(Book I – Well Construction & Pitless Systems)
Common Field Symptoms
Slow pressure loss over time
Air pockets in lines
Seasonal freeze-ups
Reduced flow despite normal pump operation
Water leaking near well casing
Likely Causes
Worn or damaged O-rings / gaskets
Debris preventing full seating of check valves
Installation too shallow
Loose cracked granted or corroded fittings
How Merrill Pitless Units Prevent Failures - Pitless Units Collection
Pressure-tested internal elbow and o-ring seal
High-quality spud gaskets or o-ring depending on model
Stainless components for long-term service life
Smooth internal pathways to reduce turbulence and flow loss
Key takeaway:Pitless failures tend to be sealing problems — Merrill’s design minimizes these when installed correctly and stainless steel used for components.
4. Diagnosing Well Cap, Vent, and Seal Problems - Well Caps, Well Seals Collection
The Handbook stresses wellhead integrity as essential for system performance and contamination prevention.(Book I – Sanitary Well Construction)
Common Field Symptoms
Insects, debris, or vermin inside well casing
Freeze-related cracks around wellhead
Likely Causes
Loose or damaged well caps
Missing or torn vent screens
Improper venting or no venting
Gaskets not seated correctly or cracked
How Merrill Well Caps Prevent These Issues - Well Caps, Well Seals Collection
Weather-resistant construction certified watertight by third party
Proper venting options to prevent vermin and contamination
Secure gaskets and fasteners designed for tight sanitary seals and serviceability
Options for varying casing diameters and material types along with grounding option
Key takeaway:A well cap is not decorative — it’s a primary defense against contamination, weather, and vermin that can destabilize the system or at least makes it difficult to service.
5. Technician Field Diagnostic Matrix
A simple list wholesalers can share with contractors:
Symptom
Likely Component
Underlying Cause
Merrill Solution
Pump cycling repeatedly
Pressure tank
Waterlogged tank diagram failed
Merrill auto shut off pressure switch
Hydrant Riser freezing
Yard Hydrant
Improper drain, shallow bury, obstructed drain hole
Premium/Economy hydrant with correct installation or add hydrant sleeve
Slow pressure loss
Check valve
Worn valve seal debris in valve
Merrill pitless replacement seals
Air in lines
Check valve / fittings
Air intrusion or failing valve
Merrill check valve + proper fittings add turque arrestor above pump
Hard hydrant operation
Hydrant internals
Debris in hydrant flush out replace plunger
Remove head flush out hydrant+ Merrill hydrant repair kit
6. How Wholesalers Can Help Installers to Prevent Failures
Wholesalers can reduce contractor callbacks by asking:
✔ “Is the hydrant drain gravel clean adequate quantity or add hydrant sleeve?”
✔ “Are check valves spaced according to WSC Handbook principles?”
✔ “Is the wellhead fully sealed with a proper sanitary well cap that is PAS97 certified?”
These questions help turn wholesalers into trusted technical advisors.
Conclusion
Water system failures almost always come down to component selection, thread sealing, or installation practices. With the engineering guidance of the Water Systems Handbook and the product reliability outlined in the Merrill Catalog, contractors can accurately diagnose problems — and fix them with confidence.
Merrill’s yard hydrants, check valves, pitless units or adapters, and well caps are built to withstand real-world conditions when installed following these principles. By understanding the failure causes and matching them to the right component, wholesalers and installers protect system performance, reduce downtime, and deliver long-lasting results.
Resources to Learn more:
1) YouTube Channel
2) Merrill Catalog
3) Water Systems Handbook (13th Edition)
Your Cart
0
Choosing a selection results in a full page refresh.